Configuring Google Cloud Storage for 3CX
Take advantage of the reliable and cost-efficient online storage on Google Cloud Platform. 3CX enables you to create storage buckets under your Google Cloud account and use these to store backups and/or archive recordings.
Prerequisites
To configure Google storage buckets, go to “IAM & Admin” > “IAM” in your Google Cloud dashboard and verify that your account has at minimum these roles assigned:
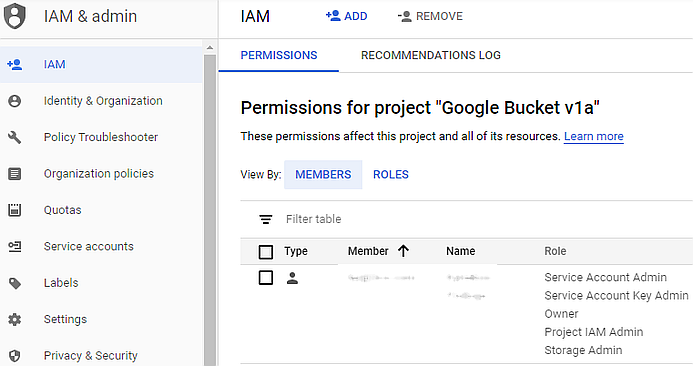
- “Service Account Admin”.
- “Service Account Key Admin”.
- “Project IAM Admin”.
- “Storage Admin”.
Creating a Service Account
To create a Google Cloud Platform storage bucket you need to first create a service account under your project:
- Go to Google Cloud Console and log in with your credentials to view your dashboard.
- Select your project from the top navigation bar, or create a new one and select it.
- Go to “IAM & Admin” > “Service accounts”.
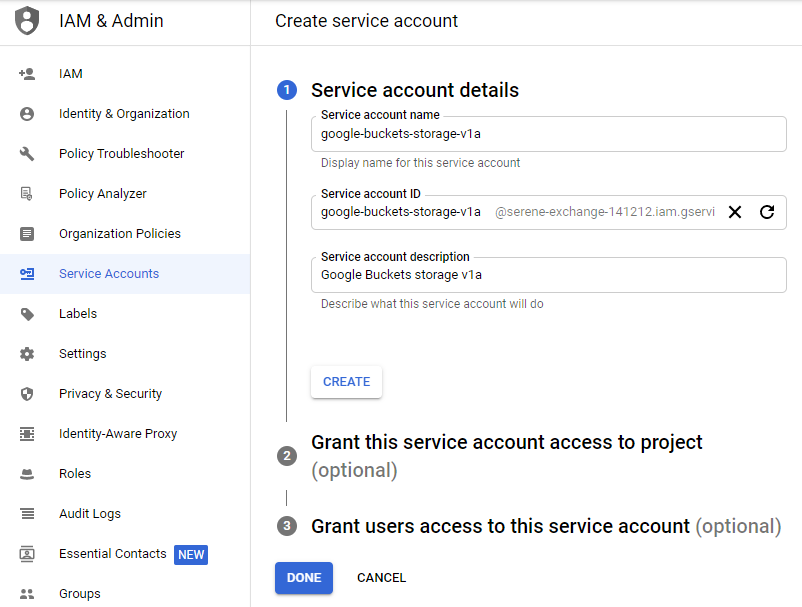
- Click on “Create Service Account” and fill in the info for the new service account in your selected project. Click on “Create”.
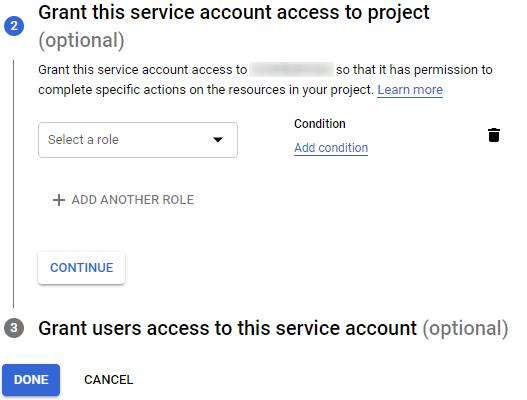
- On the “Grant this service account access to project” page, select the “Storage Admin” role,click on “Continue” and then “Done”.
📄 Note: Refer to the Google Cloud roles documentation for more info on roles and their respective permissions.
- Go back to the service account page and "Keys" section and press the "Add Key" > "Create new key". In the “Key type” select “JSON” and click on “Create”.
Creating a Storage Bucket
If you have an active subscription with configured payment options, proceed to create a new storage bucket under your Google cloud project :
- From the main navigation menu, select “Storage” > “Browser” and click on “Create Bucket” to create a new storage bucket.
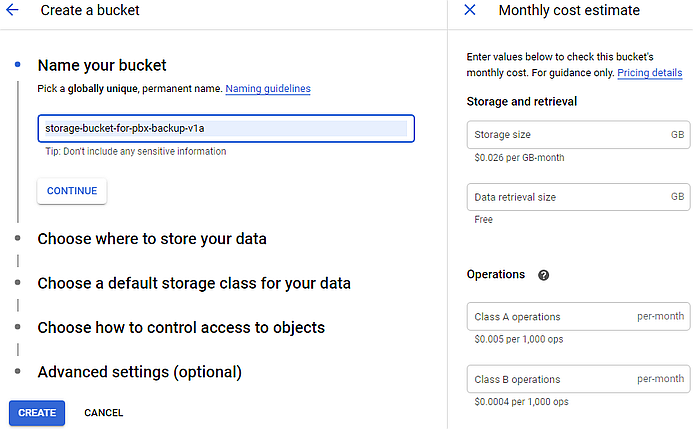
- On the "Create a bucket" page, configure:
- Name - enter a globally unique permanent name.
- Where to store data - select storage location type according to your requirements.
- Storage class - select the appropriate storage class for your use.
- Access control - set how to control access to the objects in the storage bucket.
- Advanced settings - optionally set encryption and retention policy preferences for the storage bucket.
- Click on “Create” to set up the new storage bucket.
- After creating your storage bucket, you can click on “Create folder” to add new folders for keeping backups and archived recordings in, e.g. “3cx_backups”.
Proceed to use your saved JSON key and set the configured Google Cloud storage bucket as a location to store 3CX backups and archive recordings.
⚠ Important:
- Stored backup files or archived recordings in the “Hold” state or stored/archived due to effective retention policy, cannot be deleted or overwritten by the PBX.
Related Articles
Configuring IP Phones
Introduction 3CX enables easy deskphone configuration with Supported IP Phones being tested and auto-configured. Once provisioned, you can manage the phones from the 3CX Admin Console. To provision a phone, it needs to be told to connect to 3CX via a ...Configuring a SIP Trunk
Introduction To make and receive calls, you have to create an account with a SIP trunk provider (also referred to as a VoIP provider). A SIP trunk provider will connect you to the old-style PSTN. Having your own SIP trunk provider account means you ...Configuring WhatsApp
How it works WhatsApp integration enables your agents to reply to WhatsApp messages directly from 3CX. WhatsApp messages are delivered into the same chat panel as live chat, SMS, and Facebook messages enabling you to reply to multiple channels easily ...Configuring Jabra Headsets
Introduction The users of the 3CX Phone System can use Jabra headsets in order to answer/end calls, adjust volume levels, and mute/unmute calls. (Volume and mute control features depend on the capabilities of the headset you are using). Follow the ...Hardware Requirements
Introduction Refer to these suggested 3CX Phone System usage scenarios based on the extensions used, to assist you to size the minimum required hardware to run 3CX. A user (extension) is typically defined to use the 3CX Web Client/Desktop App and a ...